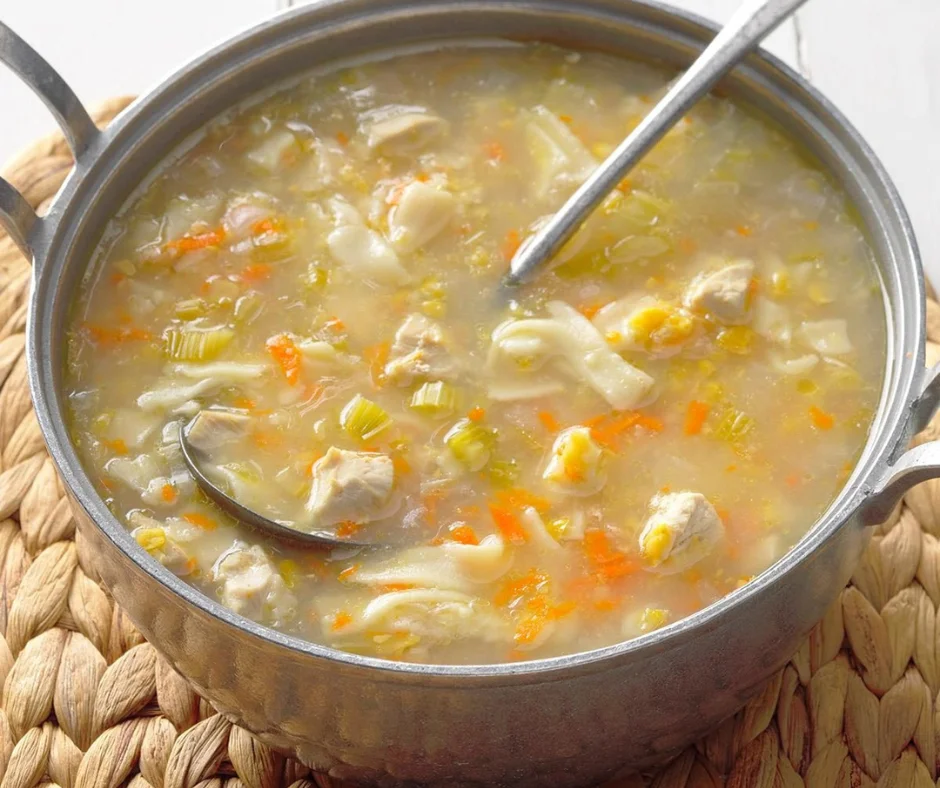
Canning chicken corn soup is a time-honored culinary practice that not only preserves the rich flavors of this beloved dish but also ensures its availability throughout the year. This delightful soup is not only comforting and flavorful but also incredibly convenient as it can be preserved for later enjoyment.
This timeless recipe is not only delicious but also perfect for canning and preserving, ensuring you can enjoy its hearty goodness anytime, anywhere.
Whether you’re looking to stock your pantry with homemade goodness or share a taste of home with loved ones, this recipe has got you covered. So, let’s roll up our sleeves and get cooking!
How To Make Canning Chicken Corn Soup?
Recipe Details
Preparation Time: 30 minutes
Cooking Time: 2 hours
Course: Main Course
Cuisine: American
Yield: Approximately 8-10 servings
Equipment Needed
- Large stockpot
- Canning jars and lids
- Pressure canner
- Ladle
- Funnel
- Jar lifter
Ingredients
- 4 cups of cooked chicken, diced
- 6 cups of corn kernels (fresh or frozen)
- 4 cups of chicken broth
- 2 cups of diced carrots
- 2 cups of diced celery
- 1 cup of diced onions
- 2 cloves of garlic, minced
- Salt and pepper to taste
Instructions
Prepare Your Equipment
Before you begin, make sure you have all the necessary canning equipment, including mason jars, lids, and a canner. Wash your jars and lids in hot, soapy water, and sterilize them by boiling them for 10 minutes.
Cook The Soup
In a large pot, combine the chicken broth, carrots, celery, onions, and garlic. Bring the mixture to a boil, then reduce the heat and simmer for 10 minutes, or until the vegetables are tender. Add the diced chicken and corn kernels, and continue to simmer for an additional 5 minutes. Season with salt and pepper to taste.
Fill The Jars
Using a ladle, carefully fill each sterilized jar with the hot soup, leaving about 1 inch of space at the top. Wipe the rims of the jars with a clean, damp cloth to remove any spills or residue.
Seal The Jars
Place a lid on each jar, and screw on the bands until they are fingertip tight. This ensures that the lids are securely in place but not too tight.
Process The Jars
Place the filled jars in a canner filled with boiling water, making sure they are completely submerged. Process pint jars for 75 minutes and quart jars for 90 minutes. Adjust processing time for altitude as needed.
Cool And Store
Once the processing time is complete, carefully remove the jars from the canner and place them on a clean, dry towel to cool. As the jars cool, you should hear the satisfying sound of the lids sealing.
Once cooled, check that all the lids have sealed properly by pressing down on the center of each lid. If the lid does not move, it is sealed and can be stored in a cool, dark place for up to a year.

Nutrition Facts Of Canning Chicken Corn Soup
- Calories: 220
- Total Fat: 4 g
- Cholesterol: 60 mg
- Sodium: 550 mg
- Total Carbohydrates: 18 g
- Dietary Fiber: 3 g
- Protein: 25 g
Serving Suggestions
- Enjoy a steaming bowl of chicken corn soup on its own for a satisfying meal.
- Pair it with a crusty loaf of bread or some crackers for added crunch.
- Serve alongside a fresh green salad for a balanced meal.
Tips And Variations
1. Feel free to customize the soup by adding other vegetables like peas or bell peppers.
2. For a heartier version, add cooked rice or pasta to the soup before canning.
3. Adjust the seasoning according to your taste preferences, adding more herbs or spices as desired.
Health Benefits Of Canning Chicken Corn Soup
1. This chicken corn soup is rich in protein, vitamins, and minerals, making it a nutritious option for any meal.
2. The combination of chicken and vegetables provides essential nutrients that support overall health and well-being.
3. Canning the soup at home allows you to control the ingredients and avoid added preservatives or excess sodium.
Special Note
Make sure to follow proper canning procedures to ensure the safety and longevity of your chicken corn soup. Always use clean, sterilized equipment and follow recommended processing times.
Conclusion
canning chicken corn soup is a rewarding endeavor that yields delicious results. Canning chicken corn soup is a wonderful way to preserve the flavors of summer and enjoy a taste of comfort all year long.
By following this simple guide, you can stock your pantry with jars of homemade goodness that are ready to warm you up on even the coldest of days. So gather your ingredients, roll up your sleeves, and let the canning adventure begin!

Canning Chicken Corn Soup
Equipment
- Large stockpot
- Canning jars and lids
- Pressure canner
- Ladle
- Funnel
- Jar lifter
Ingredients
4 cups of cooked chicken, diced
6 cups of corn kernels (fresh or frozen)
4 cups of chicken broth
2 cups of diced carrots
2 cups of diced celery
1 cup of diced onions
2 cloves of garlic, minced
Salt and pepper to taste
Instructions
Prepare Your Equipment
- Before you begin, make sure you have all the necessary canning equipment, including mason jars, lids, and a canner. Wash your jars and lids in hot, soapy water, and sterilize them by boiling them for 10 minutes.
Cook The Soup
- In a large pot, combine the chicken broth, carrots, celery, onions, and garlic. Bring the mixture to a boil, then reduce the heat and simmer for 10 minutes, or until the vegetables are tender. Add the diced chicken and corn kernels, and continue to simmer for an additional 5 minutes. Season with salt and pepper to taste.
Fill The Jars
- Using a ladle, carefully fill each sterilized jar with the hot soup, leaving about 1 inch of space at the top. Wipe the rims of the jars with a clean, damp cloth to remove any spills or residue.
Seal The Jars
- Place a lid on each jar, and screw on the bands until they are fingertip tight. This ensures that the lids are securely in place but not too tight.
Process The Jars
- Place the filled jars in a canner filled with boiling water, making sure they are completely submerged. Process pint jars for 75 minutes and quart jars for 90 minutes. Adjust processing time for altitude as needed.
Cool And Store
- Once the processing time is complete, carefully remove the jars from the canner and place them on a clean, dry towel to cool. As the jars cool, you should hear the satisfying sound of the lids sealing.
- Once cooled, check that all the lids have sealed properly by pressing down on the center of each lid. If the lid does not move, it is sealed and can be stored in a cool, dark place for up to a year.
